Friday, August 30, 2013

Long Over Due and Plant Investigation Freebie

Hello darlings!  I have had absolutely no time to blog over the last few weeks.  I have been super busy, as I am sure most of you have been too!  We have been in school since August 15th, but can I tell you, it feels like it has been a year already!!!  The first day of school felt like MAY!  You know how you are supposed to have a "honeymoon" period where the kids behave because they are trying to feel you out?  Well, let's just say, we skipped the honeymoon and we are at the five year anniversary. Wow!  I have some super kiddos and some who need LOTS of extra love!  Wish me luck! (by the way, I also have a student teacher to help! That should tell you something!)

So I thought I would post a few ideas for next year, as I obviously didn't get this posted soon enough...  Here is our photo booth for Meet the Teacher Night.  My team and I are demonstrating for you since I can't use kiddos pics.


Click here to see where I got lots of the fun printable props!

Want the third grade rocks printables? Click here.


These are the little treats I gave to my teamies on the first day.  I found cute little buckets and stickynote pads at Target.  I then put in some Extra Gum for an "Extra Awesome" Year.  Yeah, I could have made a cute tag to go with it instead of handwriting it, but as Sweet Brown would say, "Ain't nobody got time for that!"


This is how our I'm Unique Poems turned out.  We used M&M's for the apostrophe m in I'm.  They are so cute!  Click here to get the project from my Back to School Writing Craftivity Bundle.


In Science, we are learning about plants.  The kiddos had tons of fun with this homework investigation.  I gave it to them on a Friday so that they would have the weekend to go to the store and observe some roots in the produce section.  Click the pic for the freebie!

fiveforfriday2

Have a blessed day my friends!


Sunday, August 18, 2013

Back to School Sale & Some FREE Classroom Decor

Hello lovely friends! So I must admit, things has been crazy ever since the first week of August (I know you guys can all relate). I have been going nonstop since I could get in my classroom. Sorry for the little absent from me! Unfortunately, grad school starts back up for me tomorrow so I am going to try my best to keep up with blogging. We shall see how it goes with two 8 week grad classes, which includes my portfolio class. SIGH! But like Amy always reminds me, this is it for me and then I am done. There is light at the end of the tunnel! YAY! :) It will pay off in the end, and I am sure that I will be thankful that it's out of my way before kiddos are in the picture. SO if I am MIA, I will be back in the middle of October.

So I have to say, that the week before getting back into my classroom I had no clue how I wanted to set it up and how I wanted it to look. I have always loved having bright colors in my room. It seems to cheer me up and brighten up my room. After thinking about it, I started creating some new décor, and little did I know, I had almost a whole new look to my classroom. I am actually excited about how it all turned out.

Here is an overall look of my classroom. It took me about 4 days to get everything where I wanted and situated.

I feel like the bright colors really make a difference. I thought about getting colorful table cloths for all of my tables but then realized that the black would make the colors pop. I originally was going to get fabric from JoAnn's (like Amy) but was shopping in Wal-Mart and saw that black twin sheets were $4. I bought those instead. They work perfectly. :)


I love the set-up of my library. It is in the back corner and actually cornered off a bit. It's one of my favorite parts of my classroom. As you can see, I have my book labels on with ribbon. Some are on with Identa-Labels (they are like pockets that stick to the book bins and you can just slip the book labels inside it). The label has the book numbers and each book has the matching number. This makes it so much easier for my kiddos when putting books back. I give 2 kiddos the job of being the librarians. They make sure the library is nice and neat (the books are going the right direction, are in the right bins, and are organized). It works out so well for me. I also made labels to go along with my theme for my classroom. I put the theme/series, a picture, and some have the general DRA and G.R. levels. (These will be coming soon!)


I used to put clothes pins up around my walls to hang my anchor charts up. However, I got tired of looking at white paper so I decided to add some color (with the help of my great friends Amy and Gretchen). I made bulletin boards on the back wall of my classroom where I will place my anchor charts for each subject area within the designated area. I used to just separate the charts according to each subject area. However, I thought that having banners above each one would be more user-friendly for my kiddos. You can get those banners by clicking here.

I debated and debated what wall to put my alphabet on. It ended up above my Smartboard in the front of my room. I wanted to put black paper behind each letter. After thinking it through, I decided they were colorful enough and decided not to. You can get this by clicking here.


I hate to admit this but I didn't do a word wall prior to this year. However, I decided that I would give it a try. I debated and debated about where to put this. I wanted to create a big bulletin board on the back wall, but then decided to put my subject bulletin boards up there. Then I thought about putting it on my front small bulletin boards (putting half of the alphabet on one and the other half on the other). I changed my mind and decided to put it on a big dry-erase board that I have on the side of my room. (Some of my friends can tell you...I have a VERY difficult time making decisions sometimes...well most of the time)

How do I plan on using this? Again...I haven't made up my mind. LOL. :) My students and I will either write words up there using dry-erase markers or I may have them write them on index cards and tape them up there. These will be words that my kiddos keep asking me to spell repeatedly.

To make sure each letter would fit, I measured the width of my board and divided it by 13 (I put half of the alphabet on top and the other on bottom). Then I marked each amount and taped each alphabet letter within that range. It ended up looking better than I expected. You can get this by clicking here.


This is my jobs bulletin board. I make sure that everyone has a job for the week. Every Monday (or first day of the week) I change the jobs. If it is a short week, I normally have my kiddos keep the same job for the next week. This way they have enough time to do every job. My main goal is to not repeat. Sometimes it is difficult, especially at the end of the year.

I also put a "Classroom Jobs Description" up next to the bulletin board. It is a binder ring full of what each job entails. This allows the students to refer back to if they can't remember what they are supposed to do with a certain job. It really cuts down on the amount of time I have to review jobs and allows the students some independence too. You can get these by clicking here.


This is what my hallway bulletin board looks like. I did a pun on my name. Since my last name is 'Day', I decided to put "A 'Day' in 3rd Grade". I used the small nameplates to put my students' names on and then taped these up. I love using cloth pins to hang their work up with. You can download a FREE hallway banner for your classroom by clicking here. If you would like the editable small nameplates for your classroom, you can get them by clicking here.

The guitars are from my students last year for my students this year. They wrote letters talking about how 3rd grade rocks! (Thanks to Hope King for providing this wonderful idea. Click here to check it out!)


This is my informational bulletin board. It has our 3rd grade schedule, my class's specials schedule and the study hall schedule for our grade level. It also has the homework club (Thanks to 4th Grade Frolics). Click on the link to check out what the homework club entails! :)


When Amy showed me these, I was in love. I decided to make these the weekend before my first contracted day back. You have to make cones out of the paper. It took me a bit to get the hang of these but once I figured it out, it didn't take long. I wanted one to say "READ" and decided to make one with my initial of my last name to put on my classroom door. I couldn't tell you how many compliments I have gotten for these. Check out Hope King's instructions for making these. They are detailed and easy to follow. Thank you Hope King at 2nd Grade Shenanigans for the wonderful idea! :)

I am using Amy's idea for my behavior chart. Each day my kiddos start on green. They move their clips if they aren't following directions. However, I am also a BIG advocate for positive reinforcement in my classroom. I feel like it makes for a more relaxing learning environment. When I catch my kiddos doing what they are supposed to be doing and going above and beyond, I give out tickets that they keep in a zip-locked bag (the tickets you can get at a party store that you use for drawings). At the end of the year, we have a class auction. I have the kiddos donate items and we auction them off. My first time doing this was last year (thanks to a wonderful colleague, Kolleen, for the awesome idea) and my kiddos loved it. I decided to give it a try again this year. (Click here to check out Amy's awesome décor pack where you can find this chart)

On the other side of this is my Study Hall/Completed Work chart. (You can download a FREE copy of this by clicking here). I always have a difficult time knowing which kiddos have work completed and who doesn't. Therefore I created this chart to help me keep a better track of which kiddos need to stay in from recess to complete missing or incomplete work.

This is just a small snap shot of my classroom. You can find a lot of my décor in my Classroom Décor Pack-Bright Colors on TpT. Click on the link to check it out!

Ok. Here is the best part....DRUMROLL PLEASE.....Amy and I are throwing a.....


Wait...the best part is....TpT is also having a Back to School Sale. So you will receive 10% OFF EVERYTHING on top of the original TpT sale. Check out our stores by clicking on the links (Jamie and Amy)!

I am always looking for new ideas on a behavior system. What do you do in your classroom?


P.S. I wish you the best of luck if you are currently setting or getting ready to set up your classroom! If you have started school already, here is to a great here! :)

Saturday, August 10, 2013

Multiplication Game Freebie


Hello darlings!  This is it!  We are down to the wire!  Tomorrow is the last day for that amazing Educents deal I keep bugging you about!  Over 20 teacher bloggers and I teamed up to combine our best selling units!  These units would usually go between $6-$12 a piece!  That is over $200 worth of resources!  Educents is only charging $30!!!  Wow!  I am glad I got my hands on this when I could!

Check out just a FEW of the awesome bundles included!

I included my Multiplication and Division Boot Camp!


That is seriously just a little taste of what you get!  Click here to check it all out!

[Image: SCHOOL YEAR BUNDLE (Grades 2-3)]

Want a little peek into my Multiplication and Division Boot Camp?  Click here to see how I use it in my room!


Click the pic below to become a Facebook Fan and get an exclusive freebie game!!!!!


Thursday, August 8, 2013

I'm Done! Stick a Fork in Me! Classroom Pics!

Hello Darlings!  My classroom is finally set up!  Yay!  It only took me three entire days this year because I have an awesome student teacher named Jennifer who helped!  I am so grateful!

So here it is!  I hope it inspires you or gives you ideas, or makes you feel much better about your own classroom! =)


Here is the before shot.  I already put some things away and put the desks where I wanted them.  You can also see my fun adventure with the vacuum and the steam vac.  My rug was so dirty!

Here is the after pic.  It is about six in the evening, so I apologize for the lighting...


This is at the front of the room where students will turn in work and collect their mail.  The mailboxes are just shoe crates I got from Target many moons ago.  They have lasted a long time!

Here is a close up of my Behavior System, Homework Club, and Helpers.

Behavior System: Click here to download.  Students all start on green then can move down for poor choices.  I am a HUGE positive reinforcer, so I am constantly giving my students complements and praise.  If I give them a thank you (such as, "Thank you Sally for coming over to the carpet silently with your Reading Journal.") then they can enter their name in for a drawing at the end of the day.  They are constantly trying to get thank yous.  This cuts down a lot on the use of the Behavior Chart.

Homework Club:  I got my cute HW club printable for FREE from Tara at 4th Grade Frolics!  Kiddos who complete their HW will get to keep their number up.  If they didn't do it, or don't have it.  They place it on the bottom for Study Hall.  I won an awesome HW Pack from Christina Bainbridge a while ago at Bunting, Books, and Bainbridge.  She has really cool certificates that I am going to use each month for kiddos who stay in the club!

Helpers: Click here to download.  I do one boy helper and one girl helper each day.  I place their names on cards and keep them together with binder rings.  This is so much easier for me than 10 kids having 10 different jobs.  The pack does come with these two different ways to utilize helpers.

Their, They're, and There Poster:  Like the cute homophones poster?  I got it for free from Primary Poka Dots!

This is my math area.  You can see I have drawers labeled with materials such as rulers, money, pattern bocks etc.  I also have my Math Rotations chart.  You can read all about my rotations and get the posters for free here!

I also have some math vocabulary posters for addition properties and sum/difference for free!  Click here!


Here is how I store Book Boxes.  These are just ice cube trays I got from Target years ago.  They have also lasted a long time.  I think they were about $2 a piece.  You can also see my pics through the years!  I love to keep them up so when my kiddos come back a visit, they can reminisce.


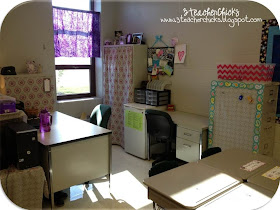
Here is my little sanctuary.  I love the fabric I used this year!  I got it at Joanne's Fabric with a 50% off coupon!  Yippy!  I used a curtain rod inside the bookcase to hide all my teaching junk.  That way you are fooled into thinking my desk it neat and clean!  Ha!  Just wait til school starts!  I can never find my desk!

You may notice I have TWO teacher desks.  The other one is for my student teacher, Jennifer.

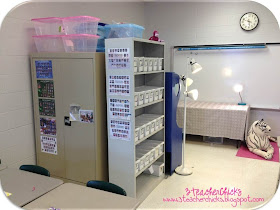
I am going to use the filing cabinet with the fabric on it for some kind of center... I'll let you know later...


Oh look it is my clean (for now) desk.  I wanted to show you UNDER my desk.  I keep all of my copies for each unit that we are working on, in these drawers.  That way they all all in one spot and easy to grab!  (and the mess is in hiding!)


Here is my small group table.  I got the picnic table from Sams.  It is so easy to call kiddos over because we don't need chairs!  Want to see how I do my conferences?  Click here.


This is on the other side of my teaching desk.  It is the computer center and where I have extra supplies for kiddos.  Get the labels here.

A big thank you to my BFF Gretchen Kassel for sewing the skirt onto my table for me! 


The newest edition to my classroom this year... MY LOCKING BOOKCASES!  Oh I am sooooo happy! Read all about this project here!


Here is a continuation of my books.  You can never have too many, especially in third grade where I have a variety of reading levels from first all the way to middle school!  The rug is from Big Lots for $25 and the hanging balls are from Target's party section.  I can't remember where I got the one that lights up...  


Speaking of the one that lights up... I completely fell off the bar stool chair while I was moving it to a different spot.  I thought I was on a low chair and stepped to get down.  Well, I stepped into air and landed  really hard on my knees.  Luckily nothing was broken and I was able to go get ice, but I have a MEAN bruise on the side of my knee!  Ouch!

Here is my adorable Birthday display!  I am so happy with how it turned out!  Click here to download!


Here is where most of the magic happens!  This is my chair and anchor chart easel.  You can see the new rubric I just downloaded for free at 4th Grade Frolics FB page!  If you become a fan, you get it for free.


I made puffy balls to hang table numbers.  Get the numbers here.


I was inspired by Hope King at Second Grade Shenanigans to make this Read Wreath.  She has awesome directions here.


Here are my desk nameplates.  If you would like them, they are editable and free!  Just follow our blog on Bloglovin please!!  Click here for the freebie!


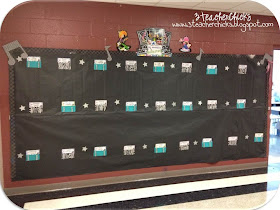
My student teacher, Jennifer, did a phenomenal job on the outside display that will stay up all year!  She even spray painted the clothespins silver!!  So cute!

At the end of the year, I had my kiddos write a letter to the incoming third graders telling them what it would be like.  I got the adorable printables from Hope King's Ultimate End of the Year Writing Bundle.


I hope this was helpful to you!  Now don't forget to check out this HUGE resource bundle from Educents! There are only 3 days left!  It is only $30 for more than 20 awesome units!  

[Image: SCHOOL YEAR BUNDLE (Grades 2-3)]

Picture of Free Teacher Downloads at Teaching Blog Addict


Blessings!